DIY KVM over IP with pikvm
- Comments(Note: this post also appears in Planet KDE and Planet openSUSE because I thought this might be interesting to others)
As I mentioned in some other posts, I have a small “server” which I use as a NAS to provide archiving for photos and other files of interest. As it runs in a remarkably small (and quiet) enclosure, I’ve managed to put it in an incospicuous part of the room it is in. For the most part, it runs without a hitch: but in some (rare) occasions it needs to be looked at, and sometimes either logging via SSH is not possible, or it is not enough to diagnose the problem. In other words, I need to check what’s on the display. And the position it is in means that attaching a monitor and a keyboard can be inconvenient at best. In other words, I needed out-of-band management.
KVM over IP
This machine does not run on server-grade hardware, and as such, it lacks a Baseboard Management Controller (BMC) like the ones found in more expensive boards (like HP’s iLO, Dell’s iDRAC, or the ASPEED AST2400 found in Supermicro boards), which means it does not have an additional network interface to do out of band management. An alternative to do this kind of work is having an additional piece of hardware, connected to the network and the server, which captures the server’s video output along with keyboard / mouse input, so that it can be controlled remotely, a so called KVM over IP.
There are a number of manufacturers that offer such devices, like Lantronix or Aten. The problem is that they’re absurdly expensive, going in the 500-1000€ range, which frankly is too expensive for my hobby-level interest.
Here comes a new challenger
One day, doing a casual search I became aware of someone who apparently had the same problem, who decided to do something about it and created pikvm. This is, according to the page itself
A very simple and fully functional Raspberry Pi-based KVM over IP that you can make with your own hands without any soldering!
This was certainly intriguing. Even more intriguing was that the project is entirely Free Software, which made it even more fit to my requirements. So after a few days of reading and researching, I decided to have a go at it.
Hardware and important notices
These are the materials and parts I used:
- One Raspberry Pi 4 2GB
- A 64GB micro SD card
- A USB-C power splitter (more on that later)
- A short USB C to USB C cable
- A Pi case with fan (this proved ultimately to be a mistake; see later on for why)
- A HDMI to CSI 2 module to feed the server’s video input to the Pi
- A USB C to USB A cable, to connect the Pi to the server for keyboard / mouse control
- A Raspberry Pi USB C power supply (at least 3A)
pikvm uses USB On-The-Go to be able to capture input from the server’s USB port and also optionally mount media (then made available to the server; think ISOs mounted as virtual CD-ROMS, for example). However, connecting directly the Pi to the USB ports of the server can be extremely problematic. The Pi’s USB C port delivers both data and power; the host machine USB ports also deliver power. In certain circumstances, this can cause a significant reverse current into the host’s USB ports, potentially frying hardware.
To prevent this “inconvenience”, one can either make a split Y cable (warning: video link), separating the power and the data lines, or use a ready-made splitter. As I frankly suck at anything which involves precision work at a reasonable level (I still can’t believe how I managed as a lab bench scientist in my early career days) I went for the splitter: one port would get only power, and the other only data, eliminating the problem.
Assembling the hardware
Unfortunately I took no photos while assembling the hardware, because I only thought about writing a blog post much later, therefore you’ll have to live with my $ADJECTIVE_OF_CHOICE prose for now. Setting the whole thing up was quite easy, easier than expected, in fact. It was only a matter of removing tape from the acrylic pieces of the case, set up spacers, and place the Pi inside.
The case I bought came with a daughterboard to provide more convenient access to the Pi’s USB ports. I attached it to the Pi itself without much thought, yet unaware of the mistake I was doing (yes, I’m building up the “suspense”).
Attaching the HDMI to CSI-2 module proved a little harder. You have to connect its ribbon cable to the Pi’s camera port (image by Ram.Sh, taken from the Raspberrpi Pi forums), but without bending it because it can easily snap if you’re not careful. I had to fiddle a bit to make sure that the tiny plastic piece acting as a stopper to the cable was actually firmly in place.
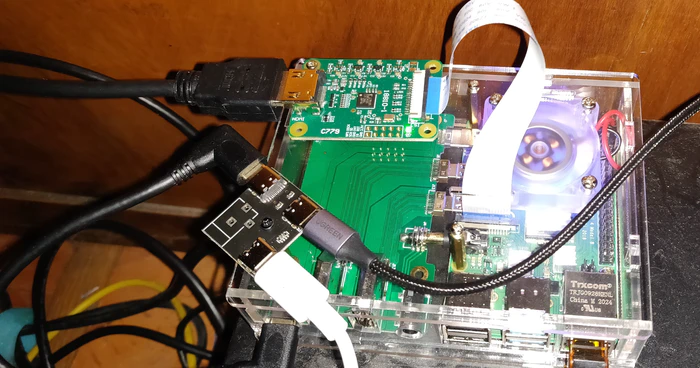
As the case could not house the splitter and the HDMI to CSI-2 module (I had originally planned to put them inside, but I based my plan on a different version of the case, and the one I have they wouldn’t fit properly) I mounted them on top of the case, using a couple of M2 standoffs and additional screws.
The original (let’s call it version 1) was something like this:

First version of pikvm
Then, I had to download the appropriate image for the Pi, flash it to the microSD card, then put the microSD card in the Pi. After that, it was just a matter of connecting the cables (USB to splitter and server; HDMI to module; network cable) and plugging in the USB C power supply.
Initial test run
First of all… it turned on, which was already a good result in itself. After a longer than expected boot (because it was generating certificates and SSH keys), the machine was finally reachable on the network (actual domain name redacted):
$ ping pikvm.example.com -c 3
PING pikvm.example.com (192.168.10.83) 56(84) bytes of data.
64 bytes from 192.168.10.83 (192.168.10.83): icmp_seq=1 ttl=62 time=3.96 ms
64 bytes from 192.168.10.83 (192.168.10.83): icmp_seq=2 ttl=62 time=4.09 ms
64 bytes from 192.168.10.83 (192.168.10.83): icmp_seq=3 ttl=62 time=3.86 ms
The first step was to change the default password for root (which is, unsurprisingly root, although I would have preferred “hunter2”). pivkm runs Arch Linux as base (with some additional repositories set up by pikvm’s author) and keeps the whole filesystem read-only. So after connecting via SSH, the first thing to do is to switch it to read-write and then change the password. There are two convenience aliases provided to make things simple.
[root@pikvm ~]# rw
[root@pikvm ~]# passwd
New password:
[...]
[root@pikvm ~]# ro
After that, it was time to access the web interface provided by pikvm. It is password protected by default, and also in this case the login / password combination is predefined (admin and admin). Thus first I accessed the terminal again and set a different password:
[root@pikvm ~]# rw
[root@pikvm ~]# kvmd-htpasswd set admin
[...]
[root@pikvm ~]# ro
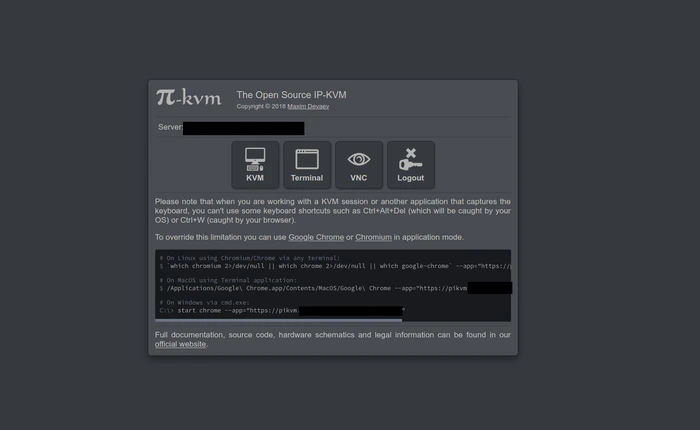
Then I could finally log in and be presented by this interface:

Main web interface of pikvm
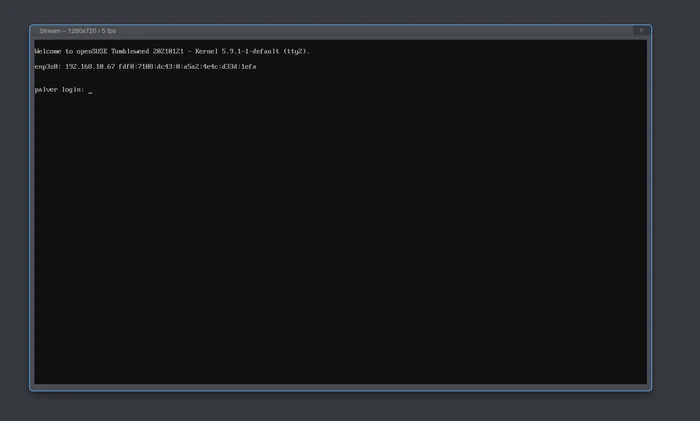
As you can see, there’s also a web terminal for those who don’t want to use SSH. You can also use VNC in place of the web interface should you want it. As I wanted to see if everything was working, I went for the KVM option. After a small embarrassing moment where I got no signal because the HDMI cable was not plugged in properly in the module (ahem), I was presented with the login screen from the server (any reference to Preem Palver, the First Speaker is not coincidental).

Screen capture from the server
I was working! But then, I tried using the keyboard… and no input arrived to the server.
Diagnosing the problem
I then tried to troubleshoot the problem. pikvm’s diagnostic said that the stream from USB was “paused” so I suspected the cabling, or the USB splitter. I then tried:
- Replacing the USB C to USB A cable (three different cables): no dice;
- Replacing the USB C to USB C cable to the splitter (three different cables): no dice;
- Using a USB C hub in place of a splitter; no dice.
I was at my wits’ end, so I just posted a question on the subreddit dedicated to the project. It was then a suggestion was made, to actually test and remove the daughterboard I had attached to the Pi. I was vaguely aware that it needed specific boot options to be used, but they were incompatible with the ones used by pikvm, so I had left them alone.
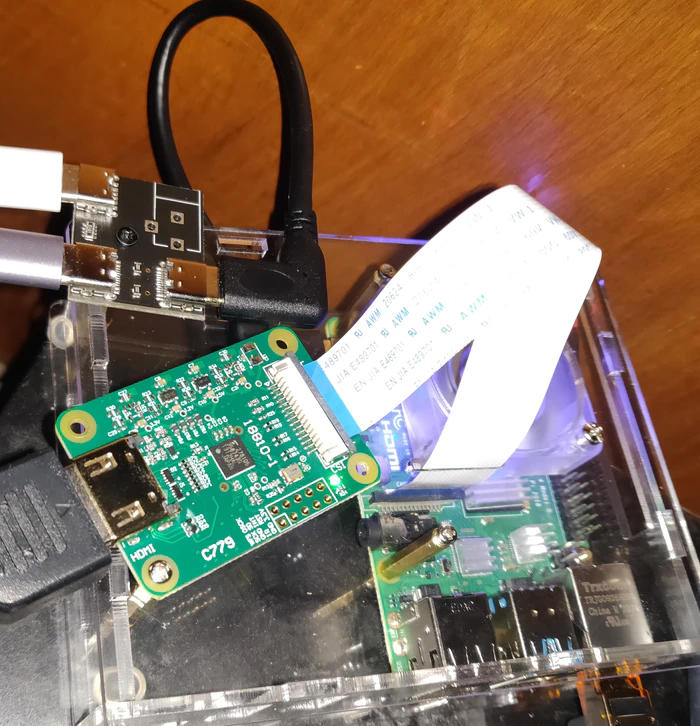
I proceeded to do so, and after removing one side of the case (or the USB C cable wouldn’t fit), I came up with the following solution:

Adjusted version without daughterboard
And after I attached it back to the server, lo and behold, keyboard input was working!

Login screen with characters typed
That is why I said it was a mistake to use that case, or at least the daughterboard. It was not suitable for the purpose and it took a while just to realize it was not forwarding data properly. In retrospect, I would’ve used a different case.
Conclusion
So that’s how I was able to prepare an affordable KVM-over-IP solution and be happy (?). The project’s maintainer, aside sponsorships, is actually working on a proper HAT (warning: video link) which is about to go on sale: a possibly better option for those who don’t want to fiddle too much like I did, which also offers additional options which require more manual work and that I did not do (like ATX power control to control the server’s power remotely).